


V-Carving a wooden sign
Creating a beautiful sign for a woodland burial ground
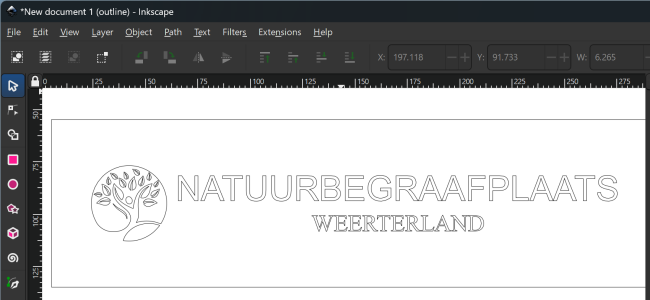
The design in Inkscape (vector curves)
This project has been shared by a hobby user in the Netherlands, who regularly uses his CNC machine for community service projects. When near his home town a project was started to lay out a woodland burial ground he gladly offered his services to create some signs. Rough wooden signs, showing both the name and the logo of Natuurbegraafplaats Weerterland (the Dutch word "natuurbegraafplaats" translates as "woodland burial ground").
The image above shows the design in Inkscape: a 2D vector drawing (this means that the drawing was made using vector curves). Such vector file (SVG, DXF or AI) can be loaded as CAD data in a DeskProto vector project.
You can find more detailed instructions for V-Carving in the Tutorial video about V-Carving.
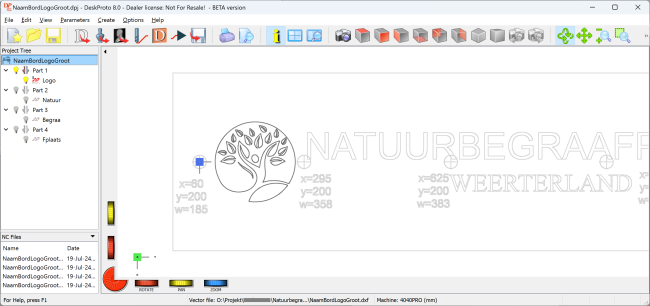
The design in DeskProto. The curves in a darker color have been selected for this operation.
As you can see in the DeskProto screenshot above, in this project the CAD data contains more information than just the design. Four different zero point positions have been drawn, together with some information about their positions. Reason is that his milling machine (working area 40 x 40 cm) is too small for this large sign (size 175 x 50 x 5 cm). So he created four different NC files, each for a part of the sign.
In the screenshot you can see that the project tree (shown on the left) contains four parts (one for each NC file), each with the zero point set to one of these positions. The screenshot shows the first part: the zero point (the blue cube) on the first position, and only the curves for the logo have been selected. The extra information in the drawing for each zero point states their position (X and Y) and the working area (W) that must (at least) be available for that part.
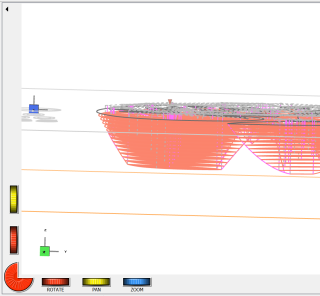
V-Carving toolpaths, left a top view and right a 3D view.
For the vector operation in this part a V-shaped cutter has been selected, and the curves of the logo have been selected for V-Carving. V-Carving means that all material within a closed curve is removed, creating a V-shaped groove. The depth of the toolpath sets the width of the groove, and DeskProto makes sure that the resulting groove exactly matches the design drawing. V-Carving has been added to DeskProto in Version 8.
In the screenshot on the right you can clearly see many roughing layers: on this small machine it was needed to go down layer by layer in small steps. The logo includes a very wide part, at that location the V-groove would become too deep. That has been prevented by setting a maximum depth: at that Z-level a flat bottom will be machined.
V-Carving in action: creating a great sign with one single toolpath (video).
The video above shows the movements of the cutter when following this V-Carving toolpath. The cutter's V shape is clearly visible, and also that the depth of the toolpath varies all the time.
The material of the block is English oak (Quercus robur). The rough sides of the block have been left as they were. The wood comes from a next community service project: Weerterlandhout. This project obtains wood from trees that have been cut down locally, in order to give it a 'second life'.
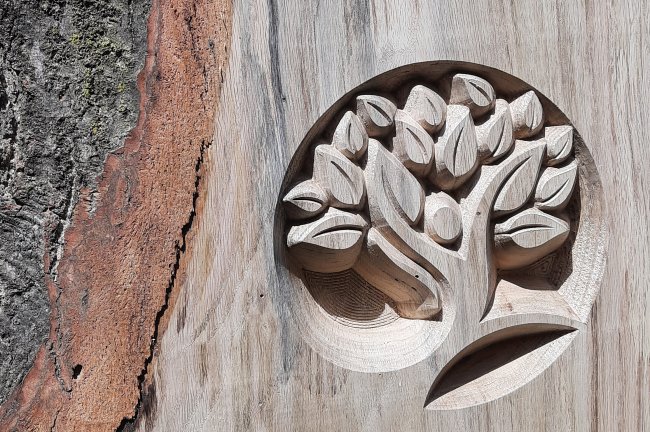
The V-Carved logo (in a smaller block of wood).
The result of the V-Carving toolpath clearly shows how it works: the small sections in the logo have been machined using one single toolpath, for larger areas a series of toolpaths has been used to remove all material within that pocket. The cusps between these toolpaths are clearly visible on the flat bottom area: due to its sharp point a V-cutter cannot create a flat horizontal surface.
At each sharp inner corner in the design the V-cutter has moved along a sloped path to the top of the material block in order to create that sharp corner.
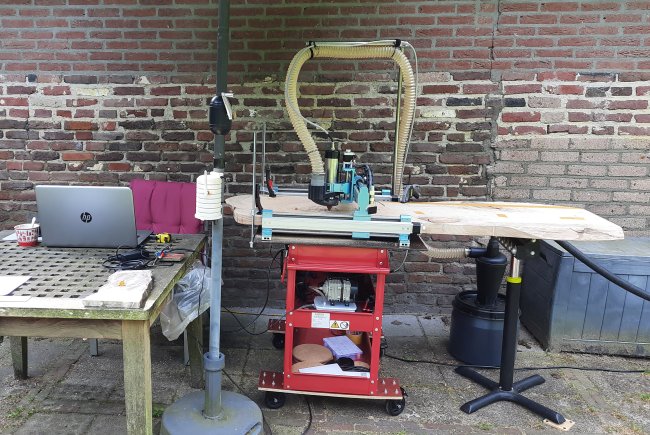
The SainSmart 4040 machine in the workshop, with the block of wood fixtured in the position to machine the logo.
As said for this project a small machine has been used: the SainSmart Genmitsu 4040-PRO, with a working area of 40 x 40 cm. The bridge construction of this machine allows to machine parts that are longer, as the photo clearly illustrates.
When moving the material to a next position (in order to machine the next part of the sign) it needs of course remain perfectly aligned. In order to achieve that a line has been drawn over the complete block, parallel to Y: the distance from this line to the side of the machine needed to be the same for all positions. The four X=0 positions had been drawn on the block as well.

The resulting sign, immediately after machining.
The text on the sign also has been machined with V-Carving toolpaths, resulting in a clear engraving with sharp inner corners.
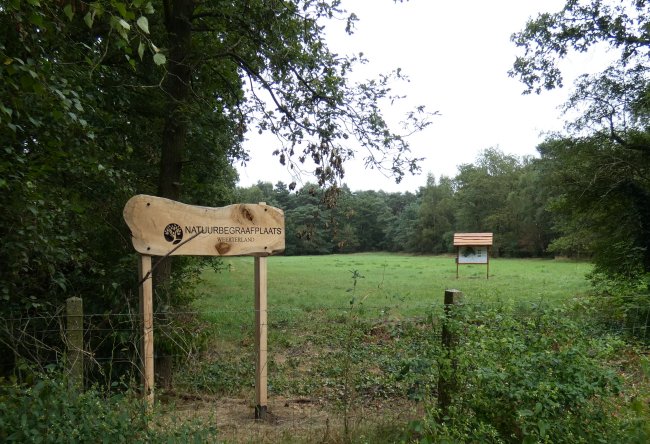
The finished sign, placed at the entry of the woodland burial ground.
Before placement the inside areas of the text and the logo have been stained in a dark color, to improve readability. The rest of the wood has not been treated: the idea is that the wood slowly will become grey, in a natural process.
Our compliments for this project: it is amazing that a sign of this large size has been created using such a small desktop milling machine. Thanks for sharing !