


Students create series of thermoforming molds
First year project for students Product Development in Antwerp
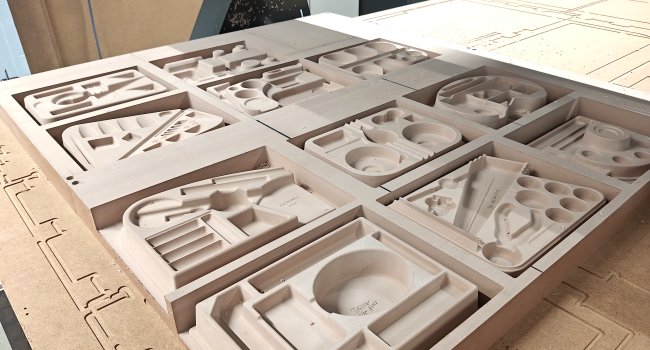
Some of thermoforming molds that were CNC machined for each student.
The University of Antwerp has a well equipped MakerSpace available for their study Product Development, including three large CNC routers and the DeskProto CAM software.
This MakerSpace is used from the start of the study: this page shows the results of the course called ‘Product and Engineering’ which is part of the first Bachelor year (140 students). The assignment is to design an organizer: executing all design stages up to a working prototype. And this prototype has to be created using thermoforming, over a CNC machined mold. Which is of course where DeskProto is used.
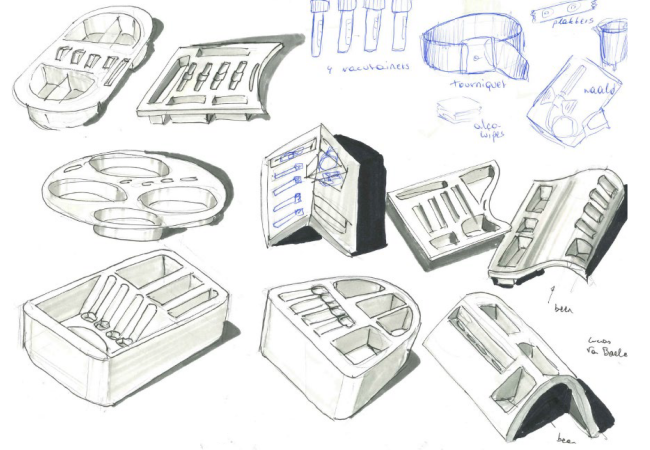
Many 'quick designs' for the organizer have been sketched (manually).
This page follows the design process of one student: Lucas van Baelen (thanks for sharing!).
His assignment was to design an organizer for medical personnel, in which they can store all material that is needed for taking a blood sample (needle, glass tubes, bandages, etc).
In his report he describes all steps taken in the design process:
- Collect information
- List of requirements
- Quick designs
- Concept designs
- Prototypes
- Final design
- Evaluation
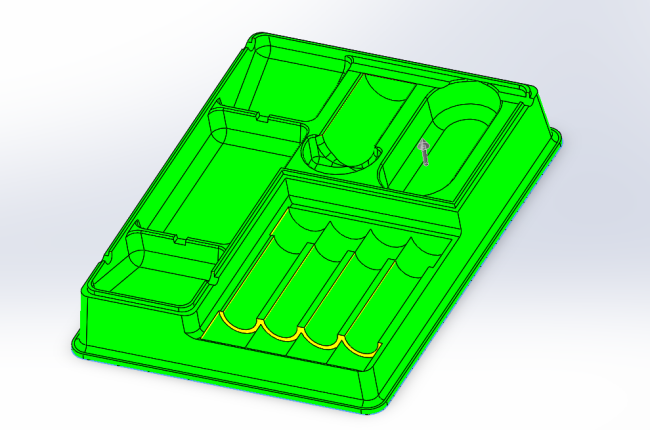
CAD model of the selected concept design: a 3D CAD model made in SolidWorks.
One of the concepts has been selected, and for that concept a complete 3D CAD model has been created, using the SolidWorks CAD software. This model needed to follow the production requirements for thermoforming: no undercuts, sufficient draft angle, limited depth/width ratio. The screenshot above shows testing the draft angle in SolidWorks: the yellow surfaces still are too vertical (insufficient draft angle).
Finally the CAD model has been exported as STL file, to be loaded in DeskProto to calculate the toolpaths. Three operations: roughing, finishing and a smoothing contour. In order to save time the same cutter (a 6 mm diameter ballnose) has been used for all operations.
The Cyborg machine in action, milling a series of molds in one large slab of tooling board.
Of the 140 designs 40 have been selected to make a final mold and prototype. The course came with a high time-pressure, as all 40 molds needed to be machined within 8 days! The group managed to achieve this in only 6 days.
This was possible by using all three routers that are present in the MakerSpace: a Cyborg (servo motor based, with a 5 Hp spindle motor) and two ShopBot machines (stepper motor based, with a 2 Hp spindle motor). They emailed us: "DeskProto is very easy and efficient so we managed to cut 2 days off the estimated 8 days".
The molds have been machined in Necuron 620 Tooling Board. Machining one mold on average took 2 hours on the Cyborg and 3 hours on a Shopbot.
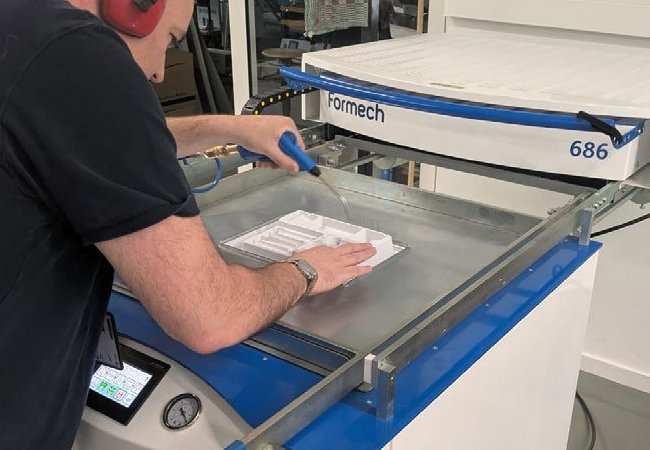
Thermoforming the final prototype over the CNC machined mold.
After the CNC machining process a number of small holes needed to be drilled in the lowest parts of the mold, needed as air vents to make the air escape during the thermoforming process. The resulting final prototype came out well, thanks to some earlier test runs that Lucas had performed using a 3D printed test mold. During these test runs some problems were detected that could be fixed before the final run.
The prototype that was thermoformed over a CNC machined mold was smoother than over the 3D printed mold, as for that mold the staircase effect of the printing layers remained visible.
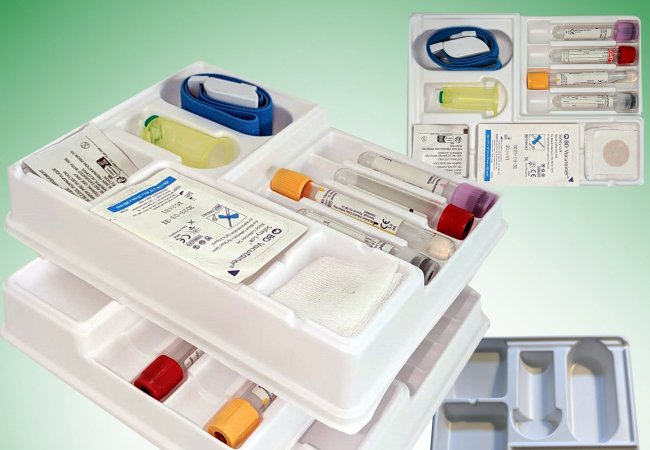
The final organizer, filled with all materials for taking a blood sample.
The resulting protype has been successfully tested in an actual blood sampling station.