The DeskProto approach offers true Concept Modelling
Article containing background information on the use of DeskProto,
published in Prototyping Technology International 1998 (pp 110-114).
In order to be used as a real Concept Modeler an RP system has to meet a number of requirements. After explaining these requirements a system is presented that indeed does meet them: DeskProto. This system is both low priced and fast, in contrast to many other 'Concept Modelers'.
Rapid Prototyping
During the past few years Rapid Prototyping has grown to a mature technology. It is now generally accepted by the design community as a handy designer tool, and known by the management as a tool to shorten lead times. It is offered by a large number of service bureaus in a fair competition, and between the RP hardware manufacturers even a process of shake- out and concentration has started.Considering the above, it is in fact very strange that still no generally accepted clear definition does exist for a process to be called Rapid Prototyping. Many different definitions are being used, varying from "Any fast prototype creation process" to just "Stereolithography". For the sake of clarity I will start this paper with our own definition, which is based on three criteria:
A prototyping process may be called Rapid Prototyping in case:
1. The process is based on the use of 3D CAD data.
2. The prototype is created (almost) automatically.
The 'almost' is added as all current processes still involve some manual labour for pre- and/or postprocessing.
3. The model is ready within a few days.
Rapid has to be taken in contrast with manually creating a prototype, which generally speaking will take several weeks.
This definition does not include the skilled craftsman who can produce a foam model by hand in, say, ten minutes (literally speaking Rapid Prototyping indeed !). Important issue is that the type of process involved does not matter: incremental techniques (LMT = Layered Manufacturing Technique) as well as decremental (CNC = Numerical Controlled milling) are included.
 |
Figure 1: Committed Cost and Incurred Cost versus the stages of the design process (the development time axis). |
The current key application of RP systems is to check a new design when it is (almost) finished: just before the large expenditure of creating the manufacturing tooling has to be done. Testing a fully functional prototype at that moment gives the opportunity to locate design errors and correct them when the costs of changing are still low. Errors that could have remained unobserved when testing the 3D CAD model only. See the graph of the incurred cost in the well known figure 1. This preproduction testing is vital: in many cases even a small series of prototypes are manufactured for testing purposes, using a Rapid Tooling process.
As this preproduction testing is the current key-application of RP, most RP systems manufacturers until now have concentrated on developing the high-end RP systems needed. However, in recent years a divergence has been observed between these high-end machines and a new type of RP machines: the Concept Modelers [Throup, 1996] and Wohlers,1997].
Concept Modelling
At this moment a number of these Concept Modelers, also called '3D Printers', have been put on the market by the RP industry (see the next paragraph). The marketing information for each of these new machines gives a lot of information about why the particular machine is in fact a Concept Modeler. Some criteria given include:- Low cost (which can be applied either to the machine or to the resulting prototypes).
- Office friendly, or 'nontoxic','environmentally safe'.
- Desktop.
- Push-button operation, or 'fully automatic', 'easy to use', '3D Printer', 'no training needed'.
- Fast, or 'free choice of accuracy'.
An interesting thought is that these criteria (as given by manufacturers of RP systems) thus do not apply to the high-end RP systems. This indeed is the case, and a company considering to invest in a high-end RP system should give this matter serious thought. Especially the skills (training) needed to operate a high-end RP machine must not be underestimated. The processes involved in high-end RP are very sensitive, and a slight change in process parameters (for instance a one degree temperature rise) may result in a worthless prototype.
The most important issue about Concept Modelers is their key application, which is completely different from the key application for high-end RP as given above. High-end RP is used at the end of the design stage; Concept Modelling right at the start of the development process, at the stage of concept design. Concept design involves a number of technical choices concerning the functioning of the new product and styling choices concerning its appearance. Concept design is mainly done by writing, sketching and creating simple CAD models: all of these being relatively lowcost activities. The cost of changing a concept are still low, the effects of the change can be very large. This is clearly illustrated in figure 1 as well, by the graph of the committed cost: most of the investments are committed during the stage of concept design.
Taking into consideration this great importance of correct concept designs, it is absolutely needed in this early design stage to support the designer in choosing the correct alternatives. One of the means to enhance the quality of these rough designs is Concept Modelling: creating physical models/prototypes for evaluation purposes. They can be used for instance to aid in choosing between design alternatives, to communicate with marketing, to test certain functional behavior. They are used as an interactive designers tool, during the design process, just like calculating a rendering or a number of section lines to clarify a difficult 3D detail. The computer peripheral to be used to output such models is called a Concept Modeler.
True Concept Modelling
Here again, for the sake of clarity we will use our own definition to define a true Concept Modeler. It is based on four criteria. In fact the same as the requirements mentioned above, however more sharply defined here. The criteria will be further explained below. A Rapid Prototyping system may be called a Concept Modeler in case:1. The price of the total system is below USD 10,000.
2. The system can be used inside a design office,
without causing any inconveniences such as noise, stench, toxic materials etc.
3. A model must be ready within one coffee break (15 min).
4. The operation must be really push-button
(as easy as printing this paper by just pressing the Print button in a word processor).
The desktop-requirement is left out, as the size of the machine is in fact not important (as long as it is office-friendly). As these requirements are very sharp indeed, and the exact limits (time and cost) mentioned are in fact arbitrary, some explanation is needed for each requirement.
The maximum price is set to ten thousand US Dollar. Reason is that for true concept modelling the machine needs to be located at the designers desk, where he/she can use it without any barriers, such as having to go to the prototyping department, asking a prototype builder to start his job, having to wait for the current 'prototype queue', applying for a budget, etc etc. A Concept Modeler needs to be readily available, to be instantaneously started by the designer. To achieve this availability value a Concept Modeler needs to be idle most of the time (say 90 %). Compare this to the use of a personal inkjet printer for 2D output.
It may be clear that this availability can only be reached if the investment needed is sufficiently low. The prices of most 'Concept Modelers' do force a high utilization rate to justify the investment done. The exact maximum price is of course arbitrary and dependant of the actual situation, however the order of magnitude is correct (ideal would be just the price of a high quality color monitor). Note that the prices per prototype as given by the manufacturers are valid only in case of a 100 % utilization, so are in fact far too low.
The no inconvenience requirement needs no further explanation. All current Concept Modelers do meet the requirement, most current high-end systems do not.
The build time of maximum 15 minutes is an arbitrary value as well. The maximum rises from the observation of designers at work. Designing is a dynamic process, requiring interactive tools to instantly aid the designer in taking decisions. Interactive does imply very short waiting times: a coffee break is the maximum to keep the process going without interruptions. This method of using RP may well be called Interactive Prototyping.
It is obvious that the accuracy of the resulting prototype is inversely related to its build time. However, for concept modelling the accuracy, surface quality etc are less important than a short build time. An ideal Concept Modeler should offer a free choice: either high accuracy at low speed or low accuracy at high speed (or anywhere in-between).
Push-button operation is needed to get the new tool accepted by the designers. Their main job is designing, not model-building, and they do not want to be bothered with any technical details concerning the build process. Just a black box: push the "3D Print" button on the CAD screen and a prototype will come out. Obviously this is not yet the case, and to achieve this a cooperation will be needed between CAD-developers and RP machine manufacturers (perhaps even a standard interface for a Microsoft Windows 3D printer driver ? ).
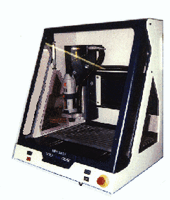
Currently a number of 'Concept Modelers' is commercially available. We have found four machines, all based on a Layered Manufacturing Technique (LMT): the Actua 2100, the Genisys, the Modelmaker II and the Z Corporation 402 (The BPM Personal Modeler is no longer available). However, when checking the criteria given for Concept Modelers a disappointing conclusion has to be drawn: despite their obvious qualities none of the machines fulfills all criteria. BR>- Prices between USD 50,000 and 60,000 are far too high.
- On any machine the build process will take at least a couple of hours, which is too slow for true concept modelling.
- Push-button operation is advertised by all, however achieved by none. Each machine is delivered with a software package to do some necessary preprocessing.
The DeskProto approach
In this paper is completely different approach is presented: the DeskProto system, offering true Concept Modelling using CNC milling. DeskProto has solved both major drawbacks of the current LMT based Concept Modelers: their high price and their low speed. A complete system is indeed available below USD 10,000 (the most lowcost even for ca USD 3,000); a prototype can be ready within ten minutes (when choosing a low accuracy and an easy material like foam).The use of CNC milling for prototype creation is of course well known, however until recently this technique was not exactly Rapid. Main problem was the calculation of the toolpaths, for which a skilled CAM software operator was needed. This process involved the importing of several surface patches and the creation and checking of toolpaths for every separate surface, which would take several hours [Wall, 1992]. In the past the CNC approach was also not suitable for Concept Modelling because of the high investments needed for machine and software. Both problems have been solved, and now CNC offers Concept Modelling possibilities that are in fact superior to LMT.
The DeskProto software has solved the above problems, making CNC very suitable for Rapid Prototyping. Its main characteristics are:
- import of STL data instead of IGES.
- no CAM-training needed: automatic toolpath generation.
- low calculation times (fast).
A fourth characteristic is the low cost of the program, which makes it suitable for Concept Modelling.
 |
Figure 2: The most lowcost CNC milling machine we ever saw (Modela): full 3D possibilities, however suitable for light foam only. |
| Figure 3: An affordable desktop CNC milling machine (CPM 2030), suitable for concept modelling. |
On the machine side things have changed too: a new generation of lowcost, desktop CNC milling machines is available right now. As the basic technique for CNC is more simple than for LMT, the prices of these milling machines are much lower. Sufficiently low to 'just buy one', for its availability value. See figures 2 and 3 for example machines.
The combination of software and machine makes an affordable desktop RP system, very well suited for concept modelling. It can be operated inside a design office by the designers, in combination with any 3D CAD software. After transferring the geometry by STL file (trouble free transfer) the user typically will change a few parameters like the tool and the accuracy to be used (all parameters have a suitable default value). From that point on calculation of the CNC toolpaths is done automatically. Finally the toolpath file is sent to the milling machine and the model is created.
An important advantage of using a CNC system for Concept Modelling is the fact that no true solids (3D CAD solid models) are needed. This in contrast to LMT systems, which cannot function with incomplete solids. During the stage of concept design in most cases simple 3D CAD models are used, consisting for instance of surfaces only. Some design bureaus even use special simple CAD software for concept design, not capable of true solid modelling. It is a known fact to experienced CAD users that the conversion to a true solid (without any cracks, gaps, orphan surfaces etc) is not easy and may in fact take a couple of days. The DeskProto software can handle any 3D geometry, from true solid to surface only, and can thus directly convert the incomplete CAD-model to a concept model.
After mentioning the many advantages, it must be said as well that CNC milling is not the best choice for all prototypes. The LMT based systems are superior for complicated prototypes that include many small details: a milling tool cannot create sharp inner corners and cavities. CNC is best suited for styling block models in foam or tooling board, a very common type of Concept Models. Three examples of this type of use are presented: the remote control unit in figure 4, the counter-display in figure 5 and the hand-tool in figure 6. Complicated, hollow models can be produced as well, however these will require a more skilled operator (figure 7).
Other DeskProto applications
In the previous paragraph DeskProto has been presented as a new type of RP system, perfectly suited for Concept Modelling applications. In addition DeskProto can be used in a number of other application areas as well, which will be presented using some more example projects. |
Figure 4: Half of the model of a hand tool, just after the CNC milling is finished. The second half can easily be attached (figure courtesy of Design bureau IDE, Switzerland). |
Styling block models in tooling board can easily be finished (color painted in high-gloss, with all product graphics and other details added) and be used as presentation models. The properties of the tooling board make it easier to finish such a model than one produced by an LMT system. In many design projects of electrical equipment like a razor or a drill two preproduction prototypes are created. One fully functional prototype, using LMT created parts of the housing that include all inner details like ribs and assembly helps. This prototype will contain all inner parts of the final product and can be tested for its functioning. However, it will not look the same as the final product. The second prototype, the styling block model, will be created to test the outer appearance. See the hand tool in figure 4, where one half of the model is just milled and ready to be finished.
 |
Figure 5: A Remote Control unit for interactive television. For this design both 'the look and the feel' were very important. A surface modelling CAD system was used to create the complicated freeform surfaces, and software tools for surface quality evaluation to enhance the quality of the surfaces. In addition physical models were absolutely needed: by touching and holding these models the surface quality could be further enhanced. These CNC milled styling block models were later finished and used to present the definitive design to the management. Even a first functional prototype has been created by making a thin-walled 'copy' of the block model in polyester, and assembling all inner parts in this cover. An LMT based prototype at that time was not possible as no solid CAD model of the inside had been created yet. Figure courtesy of DSI and ITCOM, the Netherlands. |
In products containing freeform surfaces, of which the outer appearance is very important, CNC milled prototypes are an ideal tool for surface evaluation. Accurately milling a part of the product with a ball-nose cutter and then applying high gloss paint offers a very good insight in the quality of the surface (no sudden changes in curvature etc). A good example of this application is the remote control unit in figure 5.
 |
Figure 6: A selling unit, meant to display Bodycards (r) on the sales counter. A Bodycard is a cover in which a few credit cards can be safely stored. The display unit consists of a vacuum- formed basis with a number of small slots for the cards, and a cardboard back to support the cards and to show promotional text. A concept model in foam has been created, used to test both the functionality (will the cards remain upright, can they be easily taken off, etc) and the styling. Later a hollow model in tooling board has been milled as a master to create a small series of prototypes (figure courtesy of Design bureau DSI, the Netherlands). The illustration shows a first Concept model in foam. |
A styling block model in tooling board is also a very good starting point for a number of small series production methods (Rapid Tooling). It can be directly used as a mould for vacuum forming or for hand-layup in polyester. In fact the model of the hand tool shown in figure 4 was used as a master to create a series of prototypes. In case the CNC machine being used is heavy enough, DeskProto is also suited to produce aluminium tools for small series injection moulded parts.
From aluminium tools to steel is a small step: the DeskProto software is being used by a number of toolmakers to create tools in steel. This can be done either by directly milling or by creating electrodes for spark erosion. The toolmakers typically already do have one or more large CNC milling machines, and CAM software to create 2D CNC milling paths. They want to use DeskProto as a 3D addition to their current setup, to create the cavities for complicated 3D geometry.
 |
Figure 7: A detailed, thin walled prototype in tooling board (two parts), created using DeskProto and a light CNC milling machine (figure courtesy of PD Models, Great Britain). |
It has been stated above that the DeskProto approach is most suited for styling block models. That prototypes of detailed, thin-walled geometry can be milled as well proves the housing shown in figure 7. The two parts of the housing each have been milled from two sides, on a light CNC milling machine (operated by an experienced DeskProto user). The resulting model (tooling board) has been used as a master to create a silicone mould, for a series of replicas. DeskProto is even in use to produce small, detailed wax models for jewelry production (lost wax method).
 |
 |
Figure 8: Part of DeskProto screendump: left the geometry (created by 3D scanning an existing marble bust), right the CNC toolpaths for finishing the front-side (figure courtesy of RSI GmbH, Germany). |
An application area that is often mentioned together with Rapid Prototyping is Reverse Engineering. Where in 'normal' engineering a CAD model is created based on ideas only, in Reverse Engineering a CAD model has to be created based on an existing physical product. The 3D scanners used to measure the existing product produce a cloud of point data, and it is quite difficult to convert such data to a valid CAD model consisting of 3D surfaces and/or solids. In contrast it is very easy to convert the point cloud data to an STL file: the basic file- type for DeskProto. See the example in figure 8, where a classic marble bust has been scanned. The replica is created by milling from two sides.
References
Throup, S.C.The Divergence of Rapid Prototyping Systems
Rapid News Europe, 1996 No 2, pp 28-32.
Wall, M.B. etc
Evaluating Prototyping Technologies for Product Design
Research in Engineering Design, 1992 No. 3, pp 163-177.
Wohlers, T.
Will 3D Printers Cannibalize RP systems?
Prototyping Technology International, 1997 Issue 1, pp 14-15.